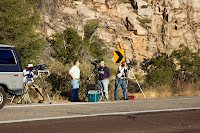
The weather the past few days has been frustrating here at my observatory...very clear skies day and night, with winds gusting on and off to 20 mph. I am off work this week, and with lots of dark time I have been looking forward to spending some serious observing time with my new (to me) C 11 Edge HD (News Flash!!). Even though I have already first lighted the telescope, the winds have been driving me crazy!
The winds died down, finally, very early this morning and when I went outside to check on conditions for Solar observing saw that high cirrus were beginning to form as a predicted front moves in. As many observers know, sometimes a very thin layer of cirrus clouds can provide favorable observing conditions for bright targets such as the Sun (or Jupiter)- I set up my Stellarvue 90mm triplet with Lunt Herschel Prism and sure enough the views of the Sun were quite stable. While there is virtually no activity in the northern hemisphere, the southern hemisphere had numerous spots stretching in a band within 15 degrees of the equator. At left is a white light image from the Solar Dynamics Observatory taken this morning. Clicking on the image will bring it up full size and includes the NOAA active region numbers within which the current sunspots exist. In addition, there is a scale at lower right to provide a sense of the size of spots relative to the Earth and Jupiter.
Below, is an image I took this morning using my ASI120MC camera. It is a stack of about 600 individual frames from an avi of 1200. Considering this was taken through a layer of cirrus, the results are quite nice and compare favorably to the SDO image. North is up, and west is to the right. Click the image to enlarge.
Saturday, December 28, 2013
Wednesday, December 25, 2013
KPNO Sunset timelapse
Inspired by several time lapse videos that I have seen of astronomical events, (including this one by Dean Ketelsen made last week) I pieced together my version of the sunset which silhouetted Kitt Peak National Observatory yesterday evening. See my previous post for more details...and it will look better if you watch it on YouTube and change the setting to 1080 HD...
Post-solstice KPNO sunset
The previous post detailed an annual trip to photograph the Sun setting behind Kitt Peak National Observatory as seen from the Catalina Highway. As this alignment occurs 3 days prior to the Winter solstice (while the Sun is trekking southward), there is a second opportunity to observe the alignment approximately 3 days following solstice as the Sun is once again passing the same point on the horizon (while trekking northward).
Approximately 10 folks came out yesterday to take pictures of the Kitt Peak ridge line and observatories silhouetted by the Sun. Once again, I was taking pictures of the Sun using my Canon T2i through my Stellarvue 90mm triplet refractor with a Lunt Solar Systems Herschel Prism and a 2x Barlow lens. This results in a focal ratio of approximately f/14. Overall, the atmosphere was far less stable than the attempt last week which made focusing quite difficult. At left is an image of the Sun about 20 minutes prior to sunset. You can see there are some very nice spots on the disc and compared to the later images below how quickly the seeing (atmospheric stability) would continue to deteriorate.
As last time, here are two images of the Sun as it set behind the National Observatory. The building that is on the left of the ridge line that appears as a "7" on its side, is the McMath-Pierce Solar Telescope. At far right on the summit is the Mayall 4-meter Telescope. Click the images to enlarge them to full size.
In addition to the generally poor seeing there was a thick inversion layer that was forming in the valley as temperatures quickly dropped around sunset. It was easy to see this layer from our vantage point as it developed. This resulted in a large amount of atmospheric dispersion and some amazing colors of the final bits of the setting Sun. Below is an image of the nearly set Sun which shows the green rim as well as some blue-
Finally, here is an image at full resolution of the camera of the last fraction of a second of sunset- The atmospheric dispersion shows colors from orange/yellow at the bottom to blue at the top! None of this was visible to the eye, as expected, but I was surprised to see this amount of color in the image- It is not much to look at due to the lack of context in the picture, however, knowing this is the Sun makes it impressive (to me anyway!)
Happy holidays!
Tuesday, December 17, 2013
Sunset behind Kitt Peak National Observatory
Click to enlarge |
I had planned to take an image every ten seconds and then make a time lapse- I set up a tracking mount along with my Stellarvue 90mm triplet refractor, a Lunt Herschel Prism, and my Canon T2i with a 2x Barlow lens. As the Sun dipped toward the horizon I made sure everything was set- and sadly, I forgot to turn off the tracking! So instead of the telescope remaining fixed on the summit observatories, it continued to track on the sun as the observatories slowly drifted up out of the field of view! Regardless I ended up with a few nice images which I present here. As you can see we had a large number of clouds drifting through and it made for some very photogenic moments.
First up, are two images of the Sun as it was descending behind Kitt Peak. As always, click them to enlarge to full size and if your browse automatically resizes images, you may need to click them again.
Next, I was delighted to discover when going through my pictures that I captured the Green Rim! Many have heard of the elusive "Green Flash" which is actually a distortion of the Sun's green rim. The short explanation for this is that our atmosphere acts similarly to a prism as the Sunlight moves through it toward us, and the suns light is refracted and spreads out much like in a rainbow. While you may expect the rim to be blue, similar to the rainbow, our atmosphere scatters much of the blue light and we are left with the upper limb of the Sun appearing greenish. When most of the Sun is below the horizon and it is no longer overwhelmingly bright, we can often see this green rim with the magnification supplied by binoculars or a telescope.
Finally, once I pulled the camera from the telescope, I put a 24-105 zoom lens on with a polarizing filter and took the image below at the 105mm setting. It was 1/500 of a second at f/4.
This was so fun, I may try again on the 24th. In case you are wondering how we could have a second opportunity to find the Sun setting in the same place on the horizon within a week...we are approaching the winter solstice in approximately 3 days. At solstice, the Sun reaches its most southerly point in our sky and then begins its trek northward...so about 3 days after solstice it will again be setting behind KPNO.
Monday, December 16, 2013
ISS Transits the Sun
Earlier this week I received an email alert from calsky.com (a wonderful site for the amateur astronomer!) that the International Space Station (ISS) would transit the face of the Sun as seen from my observatory at 3:29 PM today. Once before, in October of 2011, I observed an ISS transit (see this post) and it was quite a thrill. I was hoping to do it again and this time I was equipped with a camera that would allow me to video the event.
I invited my friend Jon Shallop to accompany me on my misadventure and as the day approached the predicted ground track of the ISS had been refined and shifted about 2-3 miles to the west. This is due to the fact the ISS is continuously dropping in its orbit (they boost it back up occasionally) and also the solar flux can affect it's orbital path. Looking at the map this morning it appeared that the center-line of the transit would run right over the southeast corner of Himmel Park, very close to the University in mid-town at precisely 3:29:29 PM. As the day wore on, heavy cirrus clouds built in the southern sky and as the time approached we were worried about seeing anything at all.
I had set up both a hydrogen alpha and white light telescope and given the thick clouds decided I would scrap the video plan and visually observe the transit. Fortunately, about 10 minutes before the transit the cirrus thinned and I decided to mount the camera to the HA telescope and see if I could record anything. Sure enough, despite the thick cirrus, I was able to capture it! The transit occurred exactly at the predicted time, indicating we were right on the center-line. Below is a single frame from the video, processed a bit to sharpen the details.
The ISS is just above left of center in the image. Of course, I was in a hurry and did not notice that I had the camera binning 2x2...so the resolution is somewhat limited...although with the very poor seeing conditions, it may have been better this way. The uneven illumination is due to passing cloud, and for my first attempt, I am happy with the results.
Saturday, December 14, 2013
Images of the Sun
It has been a few weeks since I had a window of opportunity to image the Sun. I have had a few visual moments the last few weeks but just enough time to take a look and marvel. This morning the Sun was ready for me, sporting several nice active regions which included several photogenic spots. If the atmosphere steadies a bit tomorrow, I may try and take a picture of the individual spots using a barlow lens as they are quite detailed. Below are the white light (top) and hydrogen alpha (bottom) images of the Sun, taken between 11:00 and 11:20 (18:00 and 18:20 UT) this morning. As always, click the images to enlarge them.
Venus Transit re-processed
Over Thanksgiving week I was leading a public observing program at the Mount Lemmon SkyCenter and one of the guests asked me what were my most memorable observations. It was a question that motivated me to think about all of the wonderful times I have spent with friends and colleagues enjoying time at the eyepiece. I hope to actually write up a blog post where I attempt to answer that question, and included in the answer will be observing the 2012 Transit of Venus.
I observed the transit from the summit of Mount Lemmon with my colleague Adam Block and somewhere in the neighborhood of 100 guests that attended our special Transit of Venus program. We had multiple telescopes set up, including some brought by visitors themselves, through which we observed the event. I had purchased my first DSLR (ever!) the week of the Transit in the hopes that I would be able to take some pictures through my telescope. I posted those images on the blog shortly after the transit, and to say I was lucky is an understatement. I had very little understanding of how the camera worked, and practiced with the camera and telescope for just a couple days leading up to the Transit. You can read about the adventure and see the original images on this post from June of 2012. About a month after the Transit I made an attempt to process my best raw image of second contact and was fairly satisfied with the results at the time. That post and image can be found here.
As I have been playing around with solar imaging a little bit this year, I have gained more experience in processing the images that I take. While I was previously using the freeware program GIMP, I am now using using Adobe Photoshop and have been able to identify a few techniques to improve my images. Below, is my latest attempt to bring out the best of my image of second contact- I am quite happy with the result! Click on it to enlarge.
Guest observing sunset - note the sun projecting on his eye |
As I have been playing around with solar imaging a little bit this year, I have gained more experience in processing the images that I take. While I was previously using the freeware program GIMP, I am now using using Adobe Photoshop and have been able to identify a few techniques to improve my images. Below, is my latest attempt to bring out the best of my image of second contact- I am quite happy with the result! Click on it to enlarge.
Thursday, December 5, 2013
The UA Science: Sky School
One of the most satisfying parts of my job as Director of the Mount Lemmon Sky Center has been working to develop the UA Science: Sky School, housed at the SkyCenter campus. It has been transformational for me, having the opportunity to work alongside some amazing graduate students as we create a truly unique and immersive science school. Each time we have a public school visit I am reminded why I work in higher education, at a public university.
This week, Arizona Public Media produced a piece for the TV show 'Arizona Illustrated Science', which I have embedded below. The spot does a nice job capturing the experience from the perspective of the students, their science teacher, and our graduate student staff. I have been receiving a lot of personal accolades since this aired, and the truth is that our success results primarily from the remarkable core team of individuals who are giving of their time, energy and hearts to our program. Ben Blonder, Rebecca Lipson, Pacifica Sommers...all are amazing, creative and visionary.
Clicking on Pacifica or Ben's names above will take you to their blogs, which are well worth a visit. On her blog, Pacifica provided some insight into her role in the Arizona Illustrated piece, stating "I find it easy to talk about the UA Sky School with the media because it is important and powerful. That power comes from reality and rigor. This is not nature camp or space camp. The instructors are prepared with knowledge about unique opportunities to emphasize important scientific standards and the resources to investigate them, but our activities are not simulated and our lessons are not canned. Students on the four day stays especially interact with actual scientists, using actual mountains and plants and telescopes, to do actual original research. The potential to have an epic experience in scientific discovery or outdoor adventure is tangible."
Watch the video- it speaks for itself. (You can read the accompanying web story here.)
Sunday, November 24, 2013
Lifting Prominence
If you have been following the weather here in Tucson, or perhaps watched the roasted Duck that the Arizona Wildcats football team served up yesterday afternoon (Bear Down!), you know that we have had record November rainfall here in the naked pueblo. As the low pressure system loses its local organization and begins to move out we are left with partly cloudy and fairly unstable skies. Still, I set up my 60mm HA solar telescope to take a look at the Sun between clouds this afternoon and was delighted to see some nice limb activity. As active region 11899 departs, it is putting on a farewell show- and the prominence activity on the limb is the result. After a few minutes observing and allowing the telescope to reach thermal equilibrium, I attached the ASI camera and took a 30 second avi of the Sun. Given the lack of stability, I only used 300 frames (out of about 1000) and stacked them to get the image below. It is at the full resolution of the camera and slightly reduced in size for aesthetics. In addition, I took the liberty again of brightening up the prominences in order to show the one that is lifting off. It is slightly over-sharpened, I think, but given the low quality of the original data, no complaints.
And just for fun, here is the same image inverted:
Here is a similar image, binned 2X2, with less attention to the prominences:
And just for fun, here is the same image inverted:
Here is a similar image, binned 2X2, with less attention to the prominences:
Sunday, November 17, 2013
Solar improvements
This weekend is the 2nd annual Arizona Science and Astronomy Expo at the TCC. This event which features speakers and vendors from around the world is essentially a playground for amateur astronomers. The Mount Lemmon SkyCenter has a booth and after spending the morning publicizing our activities I spent the afternoon networking with vendors and visiting with old friends. At left is my colleague Dr. Maria Perreira and I in our booth preparing for the expo opening.
While a boy can dream (see the beautiful TEC 180 on an Italian Mount at right), one of the accessories that I have had my eye on for some time was a side-by-side dovetail system which would allow me to use two telescopes at once. This is very useful in solar outreach as I can set up both my hydrogen alpha and white light telescopes at the same time. In addition, it would allow me to mount both my 12 inch SCT and small 90mm refractor at the same time for night use. I spoke with Anthony Davoli from ADM Accessories, who had been set up next to us last year and after some deliberation took the plunge on a very nice system. Not only does it allow for side-by-side mounting, but one of the saddles is adjustable in altitude and azimuth allowing for precise alignment between instruments. I spent some time figuring out how to balance this set up and was able to successfully utilize both solar telescopes this morning.
Of course, I also spent some time taking some pictures of the Sun through both telescopes. Seeing conditions were about average and the Sun is putting on quite a show right now. One of the next items I would like to find is a reducer of some sort that would allow me to fit the entire solar disc on the chip of the ASI120MC camera.
First up, the white light...click the images to enlarge them to full size.
The image below was taken at the camera's full resolution (the one above was binned 2x2) and you can see that it suffered a bit from the atmosphere. However, it does show the very large spot quite well, including some detail within the umbra.
Next, the Hydrogen Alpha...The image is binned 2x2 and I played around with brightness and contrast of the prominences to try and bring them out a little. These are features that are much fainter than the Solar disc and I am impressed that the camera is capturing them at all with the settings I am using to capture the hydrogen alpha detail in the chromosphere. Again, click the image for full size.
Monday, November 11, 2013
Veterans Day Solar Images
The image below was captured at 8:54 AM local time (1554 UT) this morning. Seeing conditions were slightly below average with the limb of the Sun in constant motion. At about 30 frames per second I am able to negate the seeing conditions somewhat, however, compared to the images I captured on November 8th when the seeing was quite good, I am able to appreciate the difference on a day like today. This is a stack of 250 frames out off 1000, binned 2x2, processed in Registax. Using Photoshop I also increased the exposure setting for the prominences on the upper limb of the Sun...it resulted in a cool look although the process did introduce some brightening artifacts on the limb.
The image below was taken at the full resolution of the little ZWO camera, 1280x960. Whenever I try this it seems that the resulting image has a grid pattern that is difficult to remove in processing. In addition, stacking a good number of frames results in artifacts that make the image appear as if it were a completed jigsaw puzzle. Focus was a little off, and it was taken a few minutes earlier than the above image, so perhaps the atmosphere steadied a bit for the later capture. In any event, here you have it-
Sunday, November 10, 2013
November 10th Sun
Clouds are coming fast this morning at the Lost Pleiad Observatory. Fortunately one of the benefits of having things set up semi-permanently is that mount, telescope, and camera are ready to go at a moments notice...just like I used to be. After last nights marathon observing session which lasted until nearly 3 AM I had a bit late of a start for solar observing, however, seeing conditions still seemed slightly above average. Generally, I find that the best atmospheric conditions for observing the Sun are between 90 and 120 minutes after Sunrise. Some days the window lasts a bit longer, but it rarely starts earlier due to the low Sun angle.
The two images below were taken through my 90mm Stellarvue f/6.3 triplet with Lunt Solar Systems Herschel Prism and a polarizing filter. Naturally, the camera is the same one I have been playing with, the ASI120MC. The images were taken without regard for the directional orientation of the Sun. If you imagine the Sun as a clock face, South is actually at about 10 O'clock; however, I like the composition better with the spots at an angle and the large group at the upper right. The midpoint of the exposure was at 11:05 AM MST (1805 UT).
The large spot group at upper right is NOAA Active Region (AR) 11890 which has been spewing out very strong X-class flares over the past few days. Often individuals want to know the size of spots relative to the Earth- and in fact we could line up about 110 Earths across the approximately 1 million mile solar diameter. So clearly the large spot within 11890 is much larger than the Earth. In fact, AR 11893 which is the home of the second largest current spot group at lower left also contains a spot that is much larger than the Earth. These spots (while still quite hot) are relatively cooler regions in the solar atmosphere which is why they appear darker. They are areas of intense magnetic activity, however, and the sheer size of 11890 is an indication to keep an eye out for flaring activity. The image below was taken with a 2x barlow lens immediately after the above image, at 11:13 MST (1813 UT). Both of these images are stacks of approximately 500 of 1500 individual frames processed in the freeware program Registax and adjusted a little in Photoshop. I am pretty unhappy with the processing, but that is what staying up late will do to me the next morning....
Jupiter's bland side
I am a glutton for punishment. Not only did I watch/listen to the entire UA vs. UCLA football game last night, I stayed up until nearly 3 AM to take an image of Jupiter and also to observe Comet Lovejoy (C/2013 R1). The comet is fantastic right now sporting a very large coma and a condensed nucleus. It is a much better target than ISON, despite the apparent lack of a tail. The comet is high enough over the eastern horizon by about 1 AM to start observing, although as it rises higher there is less atmospheric extinction and it appears brighter.
Jupiter on the other hand was much less forgiving than the comet last night. Comets are inherently fuzzy objects and one does not notice the turbulent seeing conditions as readily. Point the telescope at Jupiter and all of a sudden it looks like a living and breathing monster of a planet. The image below is a stack of only 200 frames (out of 1800!) aligned, stacked and processed in Registax. Left to right, the moons are Europa and Io. According to Firecapture (freeware used for image acquisition), the ephemerides are:
Diameter=42.44"
Magnitude=-2.45
CMI=82.5° CMII=316.8° CMIII=107.5° (during mid of capture)
The image was taken through my TEC 140 with a 2x Barlow and the ZWO ASI120MC camera.
Friday, November 8, 2013
Solar images in Hydrogen Alpha and White Light
Not a lot of time to spin words today as I am about to head off to work...but I had a bit of time this morning to capture the Sun not only in Hydrogen Alpha, but also in white light. I am pretty happy with the images and am feeling like I make a little bit of progress each time I use the camera. First off, some of the HA images...this first one I shot to try and show off the "filaprom" at the top...it had a 3D look visually.
This next image may be my best effort yet...processing skills limited me far more than the data. Incidentally, the active region near the center of the Sun has been spitting X class flares, including one around 9 PM last night.
For white light, I captured the image through my Stellarvue 90mm triplet apo and a Lunt Herschel Prism, using a polarizing filter. This is my first successful white light image:
Having fun now!
Wednesday, November 6, 2013
First time Jupiter!
I awoke at 4:30 this morning specifically to observe Comet ISON, currently cruising through the constellation Virgo as it nosedives toward the Sun. As comets go it was not that remarkable but I wanted to see it prior to it's close encounter with El Sol on November 26th. Once I finished obseving I was not going to go back to sleep so I tried my hand at imaging Jupiter with the ASI120MC video camera that has been the subject of the past few posts.
The image below is a stack of approximately 900 frames out of 1510 processed in Registax. The image was captured through my TEC 140 with a 2x Barlow in slightly below average seeing conditions, using the freeware program Firecapture. Looking at the log file that is automatically generated in Firecapture, I noticed that it provided ephemerides and other information for Jupiter. While I am not sure the source of these, pertinent data is as follows:
Diameter=41.96"
Magnitude=-2.42
CMI=320.2° CMII=223.8° CMIII=13.5° (during mid of capture, which was 12:48:36 UT, Nov. 6th)
For a first attempt, I was nearly jumping up and down...of course I needed to stay warm and this helped restore blood flow....but seriously, with more practice (and perhaps a 2.5X Powermate in my future) I believe the images will only get better. The moon closest to Jupiter is Callisto, and the two moons further out are Europa (upper) and Io (lower).
The image below is a stack of approximately 900 frames out of 1510 processed in Registax. The image was captured through my TEC 140 with a 2x Barlow in slightly below average seeing conditions, using the freeware program Firecapture. Looking at the log file that is automatically generated in Firecapture, I noticed that it provided ephemerides and other information for Jupiter. While I am not sure the source of these, pertinent data is as follows:
Diameter=41.96"
Magnitude=-2.42
CMI=320.2° CMII=223.8° CMIII=13.5° (during mid of capture, which was 12:48:36 UT, Nov. 6th)
For a first attempt, I was nearly jumping up and down...of course I needed to stay warm and this helped restore blood flow....but seriously, with more practice (and perhaps a 2.5X Powermate in my future) I believe the images will only get better. The moon closest to Jupiter is Callisto, and the two moons further out are Europa (upper) and Io (lower).
Monday, November 4, 2013
November 4th Sun
Quick capture this morning, trying to be more careful with the etalon tuning and also using a slightly shorter exposure time to freeze out some of the turbulence. Seeing was not quite as good as yesterday but I still ended up with a reasonable image. I think it is about time to start asking solar imagers about the settings that they use in Registax for the wavelet functions...I am having difficulty finding a good balance of sharpening/denoising.
Best thing about this above image is that it can be directly compared to yesterdays image and one can appreciate the changes and rotation of the Sun over 24 hours. Note that I was able to capture some prominence detail along the limb in the right side. To truly bring out the prominences, which are faint, the settings need to be adjusted (e.g. longer exposure, higher gain rate) and the surface detail will wash out. The adventure continues...
Sunday, November 3, 2013
Solar imaging take two
A week has passed since I first tried out my new ASI120MC camera, and I was able to image two targets with the camera over the past 24 hours: Venus yesterday evening, and the Sun this morning. Seeing conditions were variable last night as I attempted to capture Venus. I have a very small window from my observatory where I can actually observe Venus around sunset before it quickly passes behind a tree in my neighbors yard. Venus is inherently a difficult target to image in the evening skies as it is generally not more than 20 degrees above the horizon, and last night there were also clouds rushing in from the west. As I live east of Tucson I am also looking right over the city when I observe to the west...so seeing conditions for evening apparitions of Venus are always a mixed bag. I did manage to create the image below and it was my first attempt at using a cheap 2x Barlow lens with the camera. In order to reach focus I also had to use a mirror star diagonal, which is likely not ideal for imaging. Below is the result of stacking about 150 usable frames (out of 2000) and some processing in Registax.
While I was hoping to do some visual observing last night and ultimately try to image Jupiter, the aforementioned could bands rolled in and we were treated to a long steady rain lasting until near midnight. This morning skies were mostly clear with some passing thin cirrus and as the coffee was brewing I set up my 60mm Lunt HA scope to try and create another solar image. Seeing was fairly steady and other than the passing bands of cirrus I was able to take an avi of approximately 2000 frames. The result is below, following a stack of about 750 frames and some processing in Registax.
In some ways, this image is better than my previous attempt. Clearly (pun intended) the improved seeing conditions helped me to start with better data and more usable frames. Having steady skies also made focusing a bit easier. I also happier with the sharpening and denoising I did using the wavelet functions in Registax, although I could still be more effective with these techniques. The exposure settings were not ideal as some of the active regions are a bit washed out and I also did not have the etalon filter on the telescope tuned as precisely as I would have liked. While I had it tuned for the eyepiece I was using prior to image capture, it seems that it needs to be tuned slightly differently for the camera. This tuning process as well as precise focusing is something that I need to continue to explore if I am to improve the images. If I had to rank the importance of these factors, focusing is probably number one, followed closely by the tuning, with the atmosphere being the third consideration (and the one I have no control over). As I become more fluent in the exposure time, gamma, and gain rate settings, I will be able to compensate slightly for the atmospheric stability being less than perfect.
Saturday, October 26, 2013
solar imaging with the ASI120MC
I can not believe over a month has gone by since my last blog post...while not good blog form, I have been working almost 7 days a week for the last 6 weeks and having a ball. As I continue to work alongside some remarkable staff and graduate students in the development of the UA Science: Sky School I am reminded every day why I love my job. As satisfying as work can be, one still needs time to pursue one's hobbies and I have not had nearly enough time to observe through my telescopes. Last night I stayed up until nearly 2 AM observing some departing summer objects as well as taking my first glimpses of the year at winter objects such as the Orion Nebula and also at Jupiter. It was a beautiful night and so satisfying that I still pulled myself out of bed by 8:30 AM to play further....
(Note to self: I am not an astrophotographer...But, apparently I am attempting to play one on TV.) On a lark last week I decided to purchase my first dedicated planetary/solar imaging camera and try my hand at taking images of the Sun through my Lunt 60mm Hydrogen Alpha telescope. This morning I captured and processed my first 'reasonable' solar image using my new ASI120MC camera from ZWO Optical. This little camera has been receiving more than its share of accolades in the amateur community as an incredible value for the money. At left is an image of the key pieces that come with the camera. In addition to the camera itself, it comes with a 1.25 inch nose-piece, a USB cable, and a 150 degree lens that allows the camera to be used as an "all-sky" camera. (It also comes with a pre-installed IR cut filter (which is removable), a cable for auto-guiding, and a CD with drivers). I decided to purchase the color camera to get my feet wet in this imaging business, and the camera also comes in a monochrome version with the only difference being that instead of an IR filter, there is a clear filter installed.
So after downloading the freeware programs Firecapture and Registax, I set things up this morning and began to play with settings and features of the software to try and record a reasonable avi file of the Sun. In addition to my own issues (which are far too numerous to list), the seeing was just average and there were passing cirrus clouds that kept interrupting my process. Regardless, the little camera delivered in the sense that there is far more detail present in the captures than my processing skills are currently able to take advantage of. Further, I really have no idea what the ideal settings are for this kind of imaging in terms of shutter speed, gain, gamma, etc. The image below is the result of a trial and error process and represents 150 frames aligned and stacked in Registax...Fooling around with the wavelet functions (I do not even know what a wavelet is) resulted in some over sharpening.
Hopefully I'll have some time to research settings and learn from many of the fantastic solar imagers out there that have traveled this path ahead of me. I do enjoy a modest amount of learning by figuring things out, however, if I can at least know that I am capturing the data in an optimal fashion then I can focus my time on learning to bring out the details from the data.
Wednesday, September 18, 2013
Crepuscular rays
As I arrived home from work on Monday, I noticed that there were some very nice crepuscular rays in the western sky. These rays, streaming through gaps in the cloud, are columns of sunlit air separated by darker cloud-shadowed regions. While these rays of sunlight appear to radiate outward from the specific point in the sky (where the sun is located), they are actually near-parallel shafts of sunlight, and their apparent convergence is a perspective effect. This is similar to the way that parallel lines will appear to converge at a point far in the distance. These beautiful rays are commonly seen in the desert skies as a result of our dry atmosphere. When humidity is high, the light is diffused in the atmosphere making these rays much more difficult to detect.
The picture was taken with my Canon T2i and a 24-105mm lens operating at 40mm f/10 with a polarizing filter. The exposure was 1/200 of a second at ISO 100.
Click to enlarge
The picture was taken with my Canon T2i and a 24-105mm lens operating at 40mm f/10 with a polarizing filter. The exposure was 1/200 of a second at ISO 100.
Wednesday, August 28, 2013
Pausing to remember Dr. King
Today the nation took a moment to recognize a defining moment in our collective civil rights story- and I am thankful that even though much work remains, the moment we commemorate has not slipped from our national consciousness. Yesterday Ian showed me a couple pictures from his trip to Washington DC last spring- pictures he took standing on the steps of the Lincoln Memorial in the spot where Dr. King shared his dream. 50 years later, for Ian, the importance of the message is not lost. In fact, it is as relevant as it ever has been as we prepare to stand up against the tyranny and mass murder being carried out in Syria. There are no easy answers, and as the late Dr. King stated "Injustice anywhere is a threat to justice everywhere.”
I found this video of Dr. King online today, and it is quite prophetic. It is a part of an interview he did with NBC news in 1967, about 4 years after his "I have a Dream" speech. It is well worth watching...
Saturday, August 24, 2013
Giant Magellan Telescope mirror 3
Image Credit Dean Ketelsen |
After extremely careful inspection, the glass chunks were loaded into the oven a couple weeks ago around the custom built mold, and this past Monday the oven was turned on. Long time SOML employee and the inspiration for this blog, Dean Ketelsen published a report documenting the casting preparations which I would recommend and can be seen here. Temperatures have been ramping up over night and maximum temperature of 1165 degrees C will be between 10 and 11 PM local time tonight. Already, the glass has melted, acquiring the consistency of honey and running down into the mold. As the oven continues to heat up and rotate at almost 5 rpm the surface will slowly smooth out and the glass will become clear. Early in the hours of Sunday morning the furnace will begin a slow cool down (continuing to rotate) and around Thanksgiving the mirror will be revealed.
There are several cameras inside the oven (remarkable in and of itself!) that are taking pictures in order that the process can be closely monitored. Below are images from various temperatures which give you peek into the formation of the mirror, and the changes that occur at increasing temperatures. You can see subtle changes even between the images from 892 degrees and 900 degrees C as the glass is noticeably transforming from its slumped state to melting. I'll post a couple updates later today if I have time with pictures later in the process.
Camera 7 showing the edge of the mirror - click the images to enlarge them:
499 C |
750 C |
Camera 3 showing a wide angle view at similar temps to above - click the images to enlarge them:
499 C |
750 C |
892 C |
At this point the glass is now smoothing and you can see the reflection of the furnace top in the surface, as well as the very nice honeycomb structure of the mirror mold.
990 C |
1012 C |
At 1028 degrees C now, you can see the air bubbles that are rising up through the glass as it continues to smooth.
UPDATE- 10:25 PM local time (MST) the furnace is now nearly at "high fire" maximum temperature. You can see in both the edge view and wide view that the glass is clear and smooth. At 1160 degrees Celsius, the furnace is only 5 degrees from its top temperature.
1160 C |
1160 C |
This is a short video I shot last year while the furnace was rotating during the high fire day for the second GMT mirror.
Subscribe to:
Posts (Atom)