Wednesday, December 31, 2014

Star Adventurer testing night 2

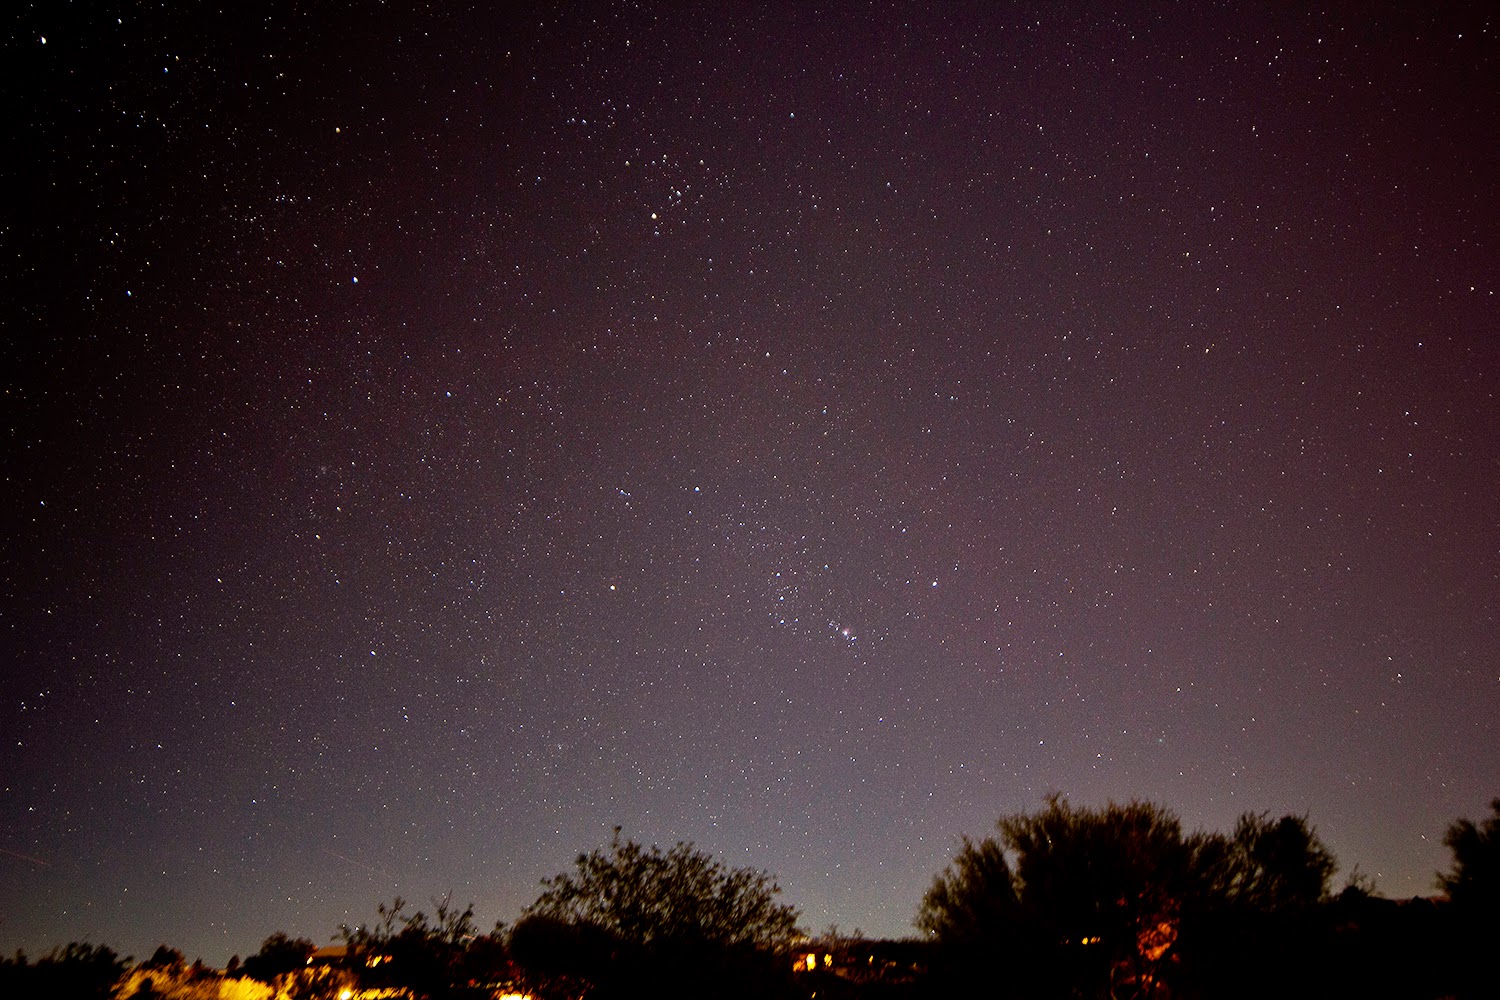
After my first successful night using the Star Adventurer mount (detailed here), I wanted to do a more thorough job of learning the ins and outs of the mount and seeing if I could truly take some long exposure images.  The first thing I did was to check during the day to see if the polar alignment scope was calibrated to the mount itself.  This is done simply by placing a distant object on the cross-hairs of the polar scope and then rotating the mount in right ascension.  If the object drifts off the cross-hairs then the polar scope is not centered precisely in the mount housing.  To my delight, the polar scope appeared nearly perfectly calibrated!  There may have been a very slight drift, yet it was so small I felt that I would not be able to make a meaningful improvement using the set-screw adjustments, and in fact I was not totally sure that I was not causing the apparent drift simply by having to move the mount manually.  Yet, sometimes I can obsess (the only enemy of good is better!), so to test this I turned the mount on and set it for 12x sidereal rate and let it track for about 10 minutes.  This would represent 180 degrees of rotation if I let it go for an hour, so in 10 minutes I had about 18 degrees of rotation and there was no appreciable drift.  This is certainly longer than any exposure I see myself doing in the near term as 18 degrees of apparent motion equates to 72 minutes of real time!

As you can see in the image above at left, I set the mount up in my driveway as I wanted to be able to do some visual observing while the camera was running some tests, and in particular I wanted to observe Comet Lovejoy which was very low in south and not visible from within my observatory until much later in the evening.  The downside of this location is that in addition to the moonlight that was pervading everything, I am looking out over our neighborhood (lots of ground level lighting) and there is periodic traffic that comes down the street- hence, one car during an exposure means I need to repeat the test!

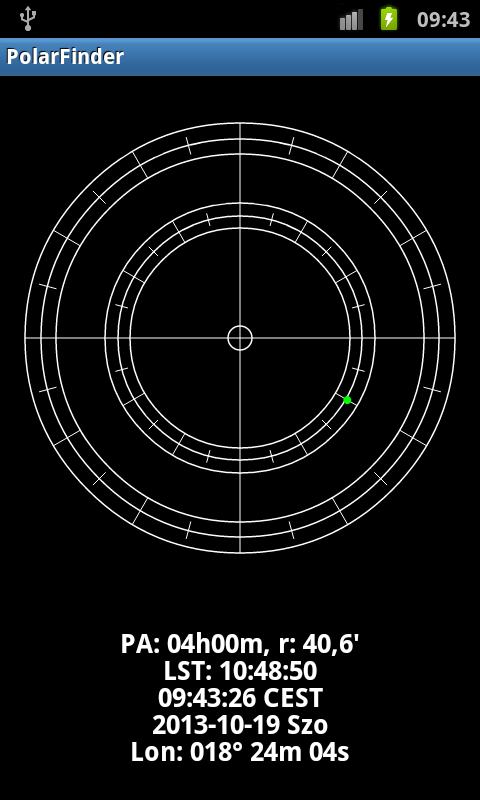
Historically, when I have done a rough polar alignment I have started by pointing about a half degree from Polaris towards the 'bright' star Kochab, as this is approximately the location of the north celestial pole.  I wanted to do a fairly precise alignment (short of drifting) and grabbed my phone to look up the location of the pole for the current time...in doing so I wondered if there was an application for my Android that might tell me and sure enough I found a great little application called "Polar Finder" which uses GPS for my time and location and then with the reticle of my choosing shows me where Polaris should be placed in the polar alignment scope.  At right is a generic screenshot from the application which shows a basic reticle (there are patterns for most well known polar scope makers) and Polaris as a green dot.

I know, get to the point, right?  Well, after polar aligning things I set up the Canon with my 14mm Rokinon f/2.8 and started taking exposures.  I did discover that in messing around as much as I was, I had the lens very slightly out of focus.  I'll post them below, but keep in mind that I was only checking to see if stars were trailing and not trying to make pretty pictures...Don't make any assumptions about the sky brightness as I did utilize Photoshop to darken the sky background as the moonlight was wickedly bright, and for most (not all) of the images I also set the ISO to 100 to reduce the sensitivity of the sensor in attempt to not get images that looked like daylight.  Below are the images with the duration in the captions, but the bottom line is that for DSLR long exposure photography, the mount delivers.

60 second test
120 second test


240 second test
360 second test


Finally, as I mentioned, I was doing some visual observing while the camera was doing its thing and lastly I looked at the moon through my TEC 140.  I couldn't resist sticking the camera in there and snapping a shot before heading in. The image below is a single shot, taken at ISO 800 for 1/1000 of a second.  Note that this was done on a non-tracking, alt-az mount!  Enjoy!


Sunday, December 28, 2014

Star Adveturer! And Comet Lovejoy (C/2014 Q2)!

Nearly New Years and I am finally writing another blog post!  Shortly after the eclipse which was the subject of my last post, Tucson hosted the 3rd annual Arizona Science and Astronomy Expo (ASAE).  You can read a report on this annual show on the blog of my friend Dean Ketelsen.  At the show I ran into another friend, Kevin Legore, who works for Sky-Watcher USA and Kevin showed me a new product that they were carrying called the "Star Adventurer," which is essentially a mini-equatorial mount and wedge designed for use on a photo tripod and with a DSLR.  Kevin noted that they would not be able to ship until the end of November so as soon as I got home from the show I went on their webpage and ordered a Star Adventurer knowing I had about a month to save the money.

I have enjoyed taking wide-field images of the milky way with my camera and have even made a few attempts at time-lapse photography such as from the Grand Canyon this summer.  Naturally, I have been limited to exposures in the range of 20-25 seconds before stars would start to trail.  This is less of an issue from my home due to light pollution, however, from Mount Lemmon or other dark sites such as Portal I would enjoy taking longer exposures.  One common way to track stars and take long exposures is to piggy back one's camera on a telescope, however, that has two disadvantages for me.  One is that it requires far more set up and gear than a simple camera tripod, and two, it means that I can not observe an astronomical target through the telescope if my priority is framing a milky way image.

Right on cue at the end of November, I received an email indicating that my credit card was being charged and that the Star Adventurer was being sent on its way.  Due to busy work schedules, poor weather, and a home renovation project (now complete) I was not able (or motivated) to test the Star Adventurer until last night.  It is not my intention to write a thorough review of the mount, nor could I after only one night of use.  Just like any other piece of equipment it takes some time and practice to learn the finer points of alignment and use.  As you will see below the Star Adventurer works as advertised.  Running on 4 AA batteries (it can also be powered by USB) it tracks the apparent motion of the sky at one of several user-selected speeds.  I only used the stellar setting in my attempts last night.  In addition, I did not calibrate the included polar scope to the mount (meaning it could be slightly misaligned), and I only performed a rough polar alignment placing Polaris about where it ought to be in the scopes reticle.  My main objective was simply to see if the unit worked as I was a fairly early adopter.  Good enough for government work anyway!


My first target, as it should be this time of year, was the constellation of Orion.  The camera attaches to the Star Adventurer with a user supplied ball-head and the first lesson I learned was that everything needs to be tightened down securely!  Not just to prevent a major disaster, but also to prevent the camera from slowly slipping/rotating during the exposure.  Once I had everything snug, I took the picture below with a 14mm f/2.8 Rokinon manual lens at ISO 800 for 30 seconds. Click to enlarge (and ignore the lens flare at lower left from a neighbors security light!).


As the sensor was exposing, I remembered that Comet Lovejoy (C/2014 Q2) was moving up through Lepus and toward Orion.  I grabbed my binoculars, found the comet easily and noted its location.  I then zoomed in on the image I had just taken and BAM! there was the comet! Below is the same image and you will see at lower right that Comet Lovejoy is labelled.


I then decided to see how the Star Adventurer would handle a heavier load and installed my Canon 70-200 f/4 zoom in place of the smaller Rokinon to image the comet.  Below is am image of the comet.


Recent images of this comet have shown that its tail has been having a very interesting past few weeks, separating from the comet with a new tail growing in place of the previous- this article from Universe Today explain matters.  I took another exposure with the ISO too high (3200) to see if I could detect any tail structure...sure enough I thought I could see hints of one, so I inverted the image, stretched things a little and sure enough, you can see a thin tail stretching to the NE in the image!


Finally, as long as I had the the heavy lens out I centered the Orion Nebula and took a 30 second image of that region, and below is the result.


All in all, pretty impressive results for night one, and remember that all the above are single shots, no stacking of images.  Taking images with heavy lenses will likely require the optional counterweight kit that Sky-Watcher sells as it did seem that the mount would struggle at certain orientations.  Also, while I stuck to 30 second exposures last night just to make sure the mount worked (I have it on some authority I ordered the first one in the US!), a more critical polar alignment is needed for me to take long exposures.

Monday, October 27, 2014

Partial Solar Eclipse

Last Thursday we witnessed a partial solar eclipse of the Sun- and for some reason this particular eclipse did not grab the attention of the media the way that the past few have.  It seemed that there were far more stories in the popular media for the lunar eclipse a couple weeks ago than for this event, despite the lunar eclipse happening in the middle of the night and the solar eclipse happening in mid-afternoon.  I was up at the Mount Lemmon SkyCenter with my colleagues (we streamed the eclipse live) and took the opportunity to take some images of the eclipse of my own.

I was using my Stellarvue 90mm triplet refractor with a Lunt Solar Systems Herschel Prism and my Canon T2i.  All the images were taken at 1/4000 of a second, ISO 100 and were shot in raw format.  I was shooting at a very high shutter speed in order to try and minimize the effects of atmospheric turbulence in my images.  I later used photoshop to increase the exposure value and stretch the contrast of the images.  Overall, the seeing conditions ranged from good to spectacular during the first part of the eclipse, but as mid-eclipse approached the conditions deteriorated slightly.  Below are a few of the best images that I captured, and as always, click to enlarge.

Start of Eclipse

Sharpest of my images, quite happy with this one!

Near greatest eclipse

A nice view after maximum eclipse, atmosphere not as stable

EDIT: The large sunspot region on the face of the Sun during the eclipse, Active Region 12192, has produced (as of yesterday) 9 X-class flares and is obviously quite large.  "How large" you are wondering?...well the blog of the SDO mission has published an interesting post comparing AR 12192 to previous spots.  If you look at the graph they provide you will see that this is the largest spot region (by area) in the past two solar cycles!  They report that it is the 33rd largest on record, and within the top .01% of all spots.  Pretty impressive stuff!

We were rather lucky to have this spot during the eclipse, and even luckier that it was in the Sun's southern hemisphere and not eclipsed by the moon, making for some pretty pictures.  Looking forward to the August 2017 Total Eclipse!

Sunday, October 12, 2014

Visiting Griffith Observatory


Perched high above Hollywood, California is another landmark of American astronomy- Griffith Observatory.  While Mount Wilson has a unique place in the history of astronomical discovery, Griffith is best known for its significant outreach program.  It is an iconic structure, visible from 360 degrees below, and is recognizable even to those not (yet) interested in astronomy and space sciences. From Rebel Without a Cause to The Terminator and the Transformers, the building has captured the imagination of many since its completion in 1935.


I was visiting the observatory with my colleague Adam to tour the facilities and to meet with Griffith staff to discuss best practices and ways that we could be mutually supportive of each other.  We were treated to a comprehensive tour of the facilities and also took in a planetarium show in the Samuel Oschin theater, Centered in the Universe, which was without a doubt the best planetarium theater show either Adam or I had ever seen.

As mentioned, the observatory was completed in 1935 as the result of the vision of Griffith J. Griffith who had visited Mount Wilson and observed through the largest telescope in the word at the time, the 60-inch reflector.  He was so moved by the experience that following consultation with Mount Wilson founder George Ellery Hale, he established a fund with the goal of providing all of mankind the opportunity for inspiration that he had experienced at Mount Wilson. Unfortunately, Griffith passed away in 1919 and his dream was not realized until after his death.

Griffith Observatory
The observatory was opened with the same telescope still in use today, the 12-inch Zeiss Refractor.  This telescope is a work of optical and mechanical art and is housed in the east dome (at left in the above image) of the observatory.  I have provided a few images of this telescope below, on its original mounting.  Riding atop the 12-inch is a 9-inch refractor and Celestron 9.25-inch Schmidt Cassegrain.


In the west dome of the observatory (at left) is a Coelostat; a telescope dedicated to observing the Sun.  Coelostat is from the Latin and means "Sky Stopper."   Below, you can see Griffith's Coelostat which consists of three 13-inch mirror flats.  These are actually the 'second' mirrors in the optical path, as there is a larger flat out of view in the image which is pointed at the Sun and reflecting the image to the three flats.  Each of these three mirrors directs an image of the Sun to a different display inside the observatory exhibit hall: A white light image, a hydrogen alpha image, and a solar spectrum.  The other two images below are of the shaft of light being focused down through the dome floor to another flat and into the hydrogen alpha telescope assembly.


Finally, a fun image from inside the exhibit hall where there is a large Tesla Coil.  This is among the most popular exhibits at Griffith and certainly is unique.  Our host fired up the coil and I managed to take a picture of it in action.  At left  is an image of the whole exhibit, as well as a full resolution crop of the electrical current below.


After a week in LA, it is good to be home!

Thursday, October 9, 2014

A visit to Mount Wilson Observatory

100-inch Hooker Telescope
I am in Los Angeles this week visiting my sister and her family and also doing a bit of business related to my day job as Director the Mount Lemmon SkyCenter.  My colleague Adam and I are visiting some of our partners in astronomical outreach on the west coast, and yesterday we visited Mount Wilson Observatory where we received an informative and inspiring tour from one of their senior docents and 60-inch telescope operator Nik Arkimovich.  Walking around the site with Nik for 2.5 hours discussing the history, politics and economy of the early 1900's provided wonderful context for considering the astronomical facilities that were erected, as well as the groundbreaking discoveries that were made at Mount Wilson.

As an amateur astronomer the visit was as impressive as a visit to any significant landmark or museum of American history.  Progressing through the afternoon was akin to progressing through a history of American Astronomy.  We walked in the footsteps of Mount Wilson Observatory founder George Ellery Hale, as well as visionaries such as Edwin Hubble, Harlow Shapley, Fritz Zwicky, and some physics genius named Albert Einstein.  Much of the site remains as it was during the early to mid 1900's when some of the most significant discoveries in astronomy were made at the the observatory.  While improvements have been made related to safety, access and technological advances, the original Snow solar telescope, the 60 and 150 foot solar towers, the 60-inch and the 100-inch Hooker telescope as well as the large trees throughout the observatory grounds bear witness to the people and ideas that have walked the paths over the past century.  Briefly, these are some of the highlights of our visit to Mount Wilson:

150 and 60 foot Solar Towers
Snow telescope enclosure
Shortly after beginning our tour, the 60 and 150 foot solar towers (image at right) came into view.  These telescopes were actually the second and third solar telescopes on site, with the first being the famous Snow telescope.  Mount Wilson's founder, George Ellery Hale, installed the Snow solar telescope in 1904 following its relocation from Yerkes Observatory in Wisconsin.  It is the oldest telescope at Mount Wilson and it's optical path is actually horizontal (parallel to) and just above ground.  At left is an image of the Snow telescope enclosure running along the ground, with the 60 foot solar tower in the background.  The design of the Snow proved to be rather poor as the image of the Sun was dramatically impacted by thermal currents swirling all along the optical path.  We were told that Hale quickly surmised that a vertical optical path would be better and the story is that he climbed various trees on site with a telescope to evaluate the localized seeing conditions.  By 1908, Hale had arranged for construction of the 60 foot solar tower and it was using this instrument that he soon identified magnetic fields in sunspots, and thus for the first time proved that magnetic fields existed outside of Earth!  Given his success and the utility of the solar tower design Hale then constructed a 150 foot solar tower in 1912, and began a daily recording of sunspots and study of their position, polarity, and strength that continues today.  You can see the most recent daily sunspot drawing from Mount Wilson by visiting this webpage.  Below is an image of the 150 foot Solar Towers.

150 foot Solar Tower
As we progressed further into the observatory grounds we were soon within the dome for the 60-inch telescope.  The 60 inch telescope was built by Hale in 1908 and funded primarily by the Carnegie Institution.  The mirror blank itself had been cast in 1894 in France and was acquired by Hale as a gift from his father.  While currently used exclusively for public outreach, this telescope was utilized for many of the pioneering studies in spectroscopy that led to the stellar spectral classification system.  Impressively, this was the largest telescope in the world until 1917 when the 100-inch Hooker telescope was finished.  Below are two images of the telescope in its dome.


Immediately below the 60-inch observatory floor are a darkroom and the original lockers that were provided for observers.  These two pictures of the lockers are worth enlarging in order to read the names...


Next up was a quick pass by the CHARA array of Georgia State University that sits atop the observatory grounds.  At right is one of the six enclosures that make up the Center for High Angular Resolution Astronomy array at Mount Wilson.  Together, these 6 one-meter "telescopes are dispersed over the mountain to provide a two-dimensional layout that provides the resolving capability (but not the light collecting ability!) of a single telescope a fifth of a mile in diameter. Light from the individual telescopes is conveyed through vacuum tubes to a central Beam Synthesis Facility in which the six beams are combined together. When the paths of the individual beams are matched to an accuracy of less than one micron, after the light traverses distances of hundreds of meters, the Array then acts like a single coherent telescope for the purposes of achieving exceptionally high angular resolution." (Quoted from this source).  Among the many notable achievements of this array was the first direct image of an interacting binary star (Beta Lyrae).

100-inch Hooker
Hooker Dome
Continuing on we approached the building and dome housing the 100-inch Hooker Telescope (at left).  The Hooker telescope was completed in 1917 and served as the largest telescope in the world until 1948 when the 200-inch telescope was installed at Palomar Mountain to the south.  The telescope is beautiful to behold and along with the furnishings and the building itself hearken back to to a time of seminal discoveries in astronomy.  In 1919, representing the first ever use of an interferometer in astronomy, an optical interferometer was used on this telescope to measure the sizes of distant stars.  Most famously, on the night of October 5-6, 1923 (almost exactly 91 years ago!) Edwin Hubble imaged a Cepheid variable star in the great Andromeda Galaxy and for the first time proved with certainty that the Andromeda 'nebula' was outside of our own galaxy and in fact a galaxy completely separate from our own.  This discovery was a key part of Hubble's pioneering work on the expansion of the Universe and the establishment of a cosmic distance scale.

Below are two images of the original, and still functional control panel for the telescope.  At left you can see the two periscope like devices that using a series of prisms allowed the observer to see the distant setting circles mounted on the telescope to note it's position.  At right you can see a close up of the brass control buttons for the telescope


If you have read this far and are interested in seeing more pictures (such as of the backside of the 100-inch mirror, or the mounting and gear system of the 60-inch) email me!  For the rest of you, I did make a one-minute video of the 100-inch Hooker telescope as I stood on the rotating platform (at the base of the dome) above the observatory floor.  Click on the settings icon (looks like a gear) to set it to HD and watch it full screen:


Again, a big thank you to Mount Wilson for hosting us, and especially to Nik for taking the time to show us around.

Wednesday, October 8, 2014

Lunar Eclipse in LA

I am in Los Angeles visiting my sister and her family in advance of some meetings related to work over the next three days (I hope to post some photos from today's meeting later...).  Very early this morning there was a total lunar eclipse, which is the type of event that even the drastic light pollution of Los Angeles can not diminish.  After spending yesterday at the beach, I was too tired to watch the whole eclipse, but I did manage to pull myself out of bed at about 2:50 AM to watch the moon slip towards totality at 3:25 AM PDT.  I was joined by my insomniac sister, who despite having instructed me not to wake her to watch the eclipse is rumored to have enjoyed it.  Below are two images I took with my Canon T2i and my 70-200mm f/4 lens during the eclipse.  Somehow in all my fiddling I did not extend the zoom all the way, so the images are taken at 180mm.

First, approaching totality at 3:19 AM (1019 UT), 1/2 second at ISO 400.  Note the blue dot to the left of the moon...and be sure to enlarge the image to see the blue dot.


Second, at 3:35 AM (1035 UT) about 10 minutes into totality.  1/3 second also at ISO 400...again, note that blue dot about a half-degree left of the moon...Anatomical jokes aside, that little blue dot is Uranus!  Make sure to enlarge to full size to see it.


And just in case you are having a hard time, here it is labelled!


Saturday, September 13, 2014

Cumulonimbus incus

Thursday night I was up at the Mount Lemmon SkyCenter doing some work aligning a telescope with a colleague and we noticed this beautiful thunderhead in the western sky at sunset.  It looked remarkably like a nuclear blast and the colors in the sky painted it beautifully.


Technically, I believe this is what is commonly referred to as an anvil cloud or in meteorological terms a single-cell cumulonimbus incus. (Incus is Latin for anvil).  These are very impressive thunderheads that can reach very high into the stratosphere, even to altitudes of 60,000 feet!

The image was taken with my Canon T2i and a 24-105mm f/4L lens operating at 50mm.  The exposure was handheld at 1/60 second, ISO 400, f/4.


Thursday, September 11, 2014

Astrobats

Two nights ago I went into our storage room where I keep the astronomy gear and gadgets that are not in my observatory and discovered some new friends...We had accidentally left the door open to the storage room the night before and these guys seized on the opportunity to homestead.  I am used to bats flying around the observatory in the evening hours and rather enjoy seeing them flit around and do their part to keep the mosquito population in check this time of year.  However, having a group of 7 of them them swirling around your head in a small room because you are in what they consider their new crib is a rather startling experience.  Below is an image of 4 of the bats that were a little more reluctant to leave than the others...there is something a little too organized in their consideration of strategy...I am pretty sure the guy behind the rafter was in charge and the other three were waiting for his command to proceed with the operation to extract the astronomer.


I am asking a few friends if they can ID these and will update if I find out.


Wednesday, September 3, 2014

Comet Jacques (C/2014 E2)

I have always enjoyed observing comets and have sketched several nice ones over the last decade.  More recently with my foray into the world of DSLR photography I have also taken a couple pictures of comets such as C/2011 L4 Pan-Starrs in the evening sky.  With a few clear nights this week as the monsoon season wraps, I made a couple observations of Comet Jacques (C/2014 E2) which has been in the northern sky for a few months.  This comet was discovered this past March, and reached perihelion (its closest point to the Sun) on July 3rd 2014, passing Venus ten days later at a fairly close 7.9 million miles!  On August 28th, the comet made its closest approach to Earth at 52,415,761 miles, which is comfortably, a little more than half the distance to the Sun.

Two nights ago, on Sept 2 (UT) I took my first pictures of a comet through a telescope!  Using my 140mm refractor, I captured ten 20-second images of the comet, at ISO 1600 using the program BackyardEOS.  Below is a single image of the comet with the levels and contrast adjusted in photoshop.


My intention in taking 10 exposures was to stack them, bringing out any detail that may not be visible to the eye or in a single exposure.  In the stacked image below, you can see that I aligned the images on the comets nucleus and as a result the stars appear to trail.  There is a brighter inner coma around the nucleus as visible in the above image, and stacking the exposures revealed a fainter outer envelope of glowing gas.


Being my first try with a comet, I think this little experiment turned out quite well.  This attempt was all about getting my feet wet imaging a comet with a DSLR.  Next time I will pay more attention to timing my exposures in order that the star trails are more uniform, and will also spend a little more time figuring out the optimal exposure.