 |
| January 30th, 2011 |
My goal in sketching is twofold. First and foremost sketching makes me a better observer. Whether at night or during the day, I spend more time observing faint and fine details when I am trying to re-create them on paper. Second, and less important to me, is to keep a record of my solar observations. As a result of my priorities, I do not fret over the exact positioning of details although I do try and maintain the size and perspective as they appear in the eyepiece.
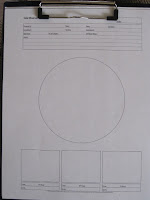
I begin by printing out a blank solar observing form that has been made publicly available by sketch artist Jeremy Perez, who maintains the Belt of Venus website. I then use a graphite HB pencil to shade in the entire disc. Do not worry at this point about uneven shading, as the rest of the process will even out the Chromospheric network that I try to represent. Below are the first two steps in the process:
The next step takes awhile, and I have actually gotten in the habit of preparing these solar discs ahead of time. By doing these ahead of time, I can get right to observing and sketching the Sun when my schedule and the weather cooperate. I sharpen my pencil and then add a layer of random squiggly (technical term) lines over the entire solar disc. I am careful not to draw circles or straight lines, as inevitably these show through in the final product...and what I am after is a randomness to the look of the disc. Once I have filled the entire disc with squiggles, I take a blending stump and using small circles, rub the drawing to blend both layers of graphite that I have applied. I do try and blend the disc to a somewhat even appearance so that I do not end up with areas that are markedly darker or lighter than others. The idea is that when I am done, the squiggly lines still show through a bit and the disc resembles the hydrogen alpha view of the sun without any features.
At this point I am done, if preparing ahead of time, as this discs are ready for use in making a solar sketch. Prior to drawing in any details such as active regions, filaments and prominences, I spend about 10-20 minutes observing the sun to get the overall picture of the disc, noting what details are present and where they are. I also adjust the tuning of the etalon filter in my scope to bring out some of the features that are best observed on the blue and red wings of the hydrogen alpha band. Once I have seen what I believe can be seen that day, I use an eraser to mark the locations of plage and active regions. I erase an area that is slightly larger than the actual region, so that I can then fill in the edges, creating a more realistic look and shape. Once I have these regions erased into the sketch, I use them as markers to locate filaments and prominences around the disc. After I have drawn in these these other features, I return to the plage areas and spend some time filling in spots, filaments, fibrils, whatever I can. Typically I see much more detail than I can record, however, I try to finish my sketch feeling like I captured the significant details. I will often use a mechanical pencil to draw some of the faint magnet field field lines that surround the plage areas.
There you have it, the secrets of a solar sketching hack revealed! Feel free to drop me a note with any questions...


No comments:
Post a Comment