Showing posts with label Canon T2i. Show all posts

Saturday, January 3, 2015

Solar flashback and why I am not an astrophotographer

One reason I am not a serious astrophotographer: Patience.

I enjoy taking some casual images of bright targets such as the Sun, moon, or a planet but I rely heavily on being able to process these images in a quick and efficient fashion.  I do not have the motivation or desire to spend a lot of time learning the ins and outs of varied software packages to create astronomical images of the highest quality.  Many call my approach to obtaining a nice image "lucky imaging."  At left is a single shot of the Sun taken back on October 23rd when we had the largest sunspot in 24 years near the center of the Solar disc.  On the same day I made a video (AVI) recording of the Sun using my ASI120MC astronomical video camera in the hopes of stacking multiple frames to achieve a sharp, high resolution image.  Below is the AVI file as captured.


This is where the story takes a long break.  Back in the fall I broke down (and nearly went broke...emotionally and economically...) and purchased a new laptop.  I had a very nice 5 year old laptop that was still humming along quite well, yet technology has improved dramatically and doing a lot more work on the go I wanted something a bit lighter than the old 5+ pound beast.  I did my research, moved through periods of analysis-paralysis, wavered on what features I was looking for, and ended up with a Samsung Ativ Book 9 plus.  It is a very nice laptop and I only have two issues that remain.  One is Windows 8.1 which I can't do anything about, and the other is that the display has a resolution of  3200 x 1800 pixels, in a 13-inch class screen.  While this produces stunningly sharp images and can be useful in processing photos, it is somewhat of an annoyance in that several software programs do not always display properly and one can end up with text that is so small as to render it unreadable even with reading (magnifiers) glasses!  There are work arounds and settings that can be tweaked and for the most part things can be set effectively.

Two specific examples that are driving me nuts are Registax 6 and Adobe Camera Raw, both of which I use in the image processing I do.  Registax is used to align and stack multiple frames from AVI recordings (of say the Sun) and is just not displaying properly or working properly on the new laptop.  I have been fighting it since the fall and as a result have not been able to process a single AVI file.  I have known this day was coming but I finally decided to try another program and this morning downloaded and made a first attempt using a freeware program called Autostakkert2!  It seems to work fine, but does not contain the wavelet sharpening tools that Registax does.  Fortunately that functionality of Registax is still usable.  I Also will try a program called Avistack to see which I like better.

Adobe is particularly frustrating in that I was able to get Photoshop to display in a small but reasonable fashion, yet when opening a raw file the window does not display at the proper settings. See the image below and compare the text (not the title bar, but the controls) in the raw window to the application window in the background.


In any event, back to the AVI file I captured back on October 23rd.  Using Autostakkert2! this morning, I did stack and align the best 50% of the frames (out of about 1000) and then use the wavelet filters in Registax to create an image.  While not perfect, you can immediately see it is sharper than the single shot at the top of the post.  I think I can do better as I learn to use AutoStakkert2! (or Avistack) but at least I am back in business with AVI files.  Jupiter season is here, we have a bright comet in the sky, and stacking images is a must to capture these sights!


Thursday, January 1, 2015

Happy New Year and Anniversaries!

[Cave+Laura.jpg]
My Lost Pleiad
2015 is here and with it comes the 5th anniversary of this blog.  I began on January 1st, 2010 (inspired by my friend Dean Ketelesen) with two posts, including this one detailing the inspiration and story of the Lost Pleiad Observatory.  While 2014 saw the least amount of blogging, I do hope to bear down and do more writing this year-  Life certainly has no shortage of material for the blog.

In addition to the blog anniversary, it is also our 19th wedding anniversary!  I am reaching that point in life where despite how long 19 years seems looking forward, it feels like an instant looking in retrospect.  Hairs are graying, my dear son is about to turn 16 and there is an increasing realization that every moment matters.  I look at my lovely and wife and (increasingly GQ) son and know that I am amazingly fortunate.


In addition to being the first day of 2015, I believe that in all my years in Tucson, Arizona this is the first time I recall snow on New Years day!  Yes, you read that right, we awoke to a dusting of snow this morning.  True to most snowfalls in Tucson, it only takes 2-3 hours of sunshine to erase all traces of this beautiful event, but nonetheless it was an awesome anniversary and New Year's present.


Cosmo, our dog (he had that name when we adopted him 11 years ago), let me know at sunrise that it was time for him to go play in the snow.  He has seen snow before, traveling with me to Mount Lemmon and something about it gets him riled up to play like a puppy.  He also let me know that I do not give him enough attention on the blog, so without further ado, here he is enjoying himself in the white stuff.


Finally, here is a picture I had taken a few weeks back from the 7 Cataracts Vista on the Catalina Highway.  It is looking over Thimble Peak towards sunset and just to the left of Thimble Peak you can just make out the dome of the  Mayall 4-meter telescope at Kitt Peak National Observatory on the most distant ridge.


Happy New Year!


Wednesday, December 31, 2014

Star Adventurer testing night 2

After my first successful night using the Star Adventurer mount (detailed here), I wanted to do a more thorough job of learning the ins and outs of the mount and seeing if I could truly take some long exposure images.  The first thing I did was to check during the day to see if the polar alignment scope was calibrated to the mount itself.  This is done simply by placing a distant object on the cross-hairs of the polar scope and then rotating the mount in right ascension.  If the object drifts off the cross-hairs then the polar scope is not centered precisely in the mount housing.  To my delight, the polar scope appeared nearly perfectly calibrated!  There may have been a very slight drift, yet it was so small I felt that I would not be able to make a meaningful improvement using the set-screw adjustments, and in fact I was not totally sure that I was not causing the apparent drift simply by having to move the mount manually.  Yet, sometimes I can obsess (the only enemy of good is better!), so to test this I turned the mount on and set it for 12x sidereal rate and let it track for about 10 minutes.  This would represent 180 degrees of rotation if I let it go for an hour, so in 10 minutes I had about 18 degrees of rotation and there was no appreciable drift.  This is certainly longer than any exposure I see myself doing in the near term as 18 degrees of apparent motion equates to 72 minutes of real time!

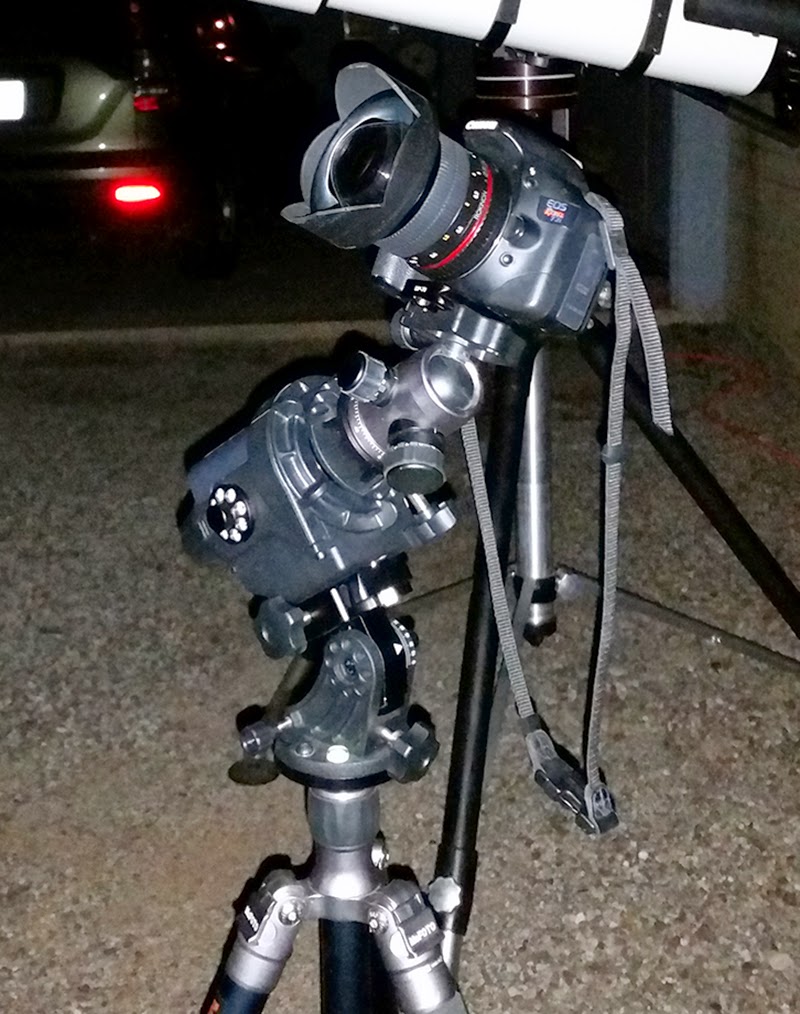
As you can see in the image above at left, I set the mount up in my driveway as I wanted to be able to do some visual observing while the camera was running some tests, and in particular I wanted to observe Comet Lovejoy which was very low in south and not visible from within my observatory until much later in the evening.  The downside of this location is that in addition to the moonlight that was pervading everything, I am looking out over our neighborhood (lots of ground level lighting) and there is periodic traffic that comes down the street- hence, one car during an exposure means I need to repeat the test!

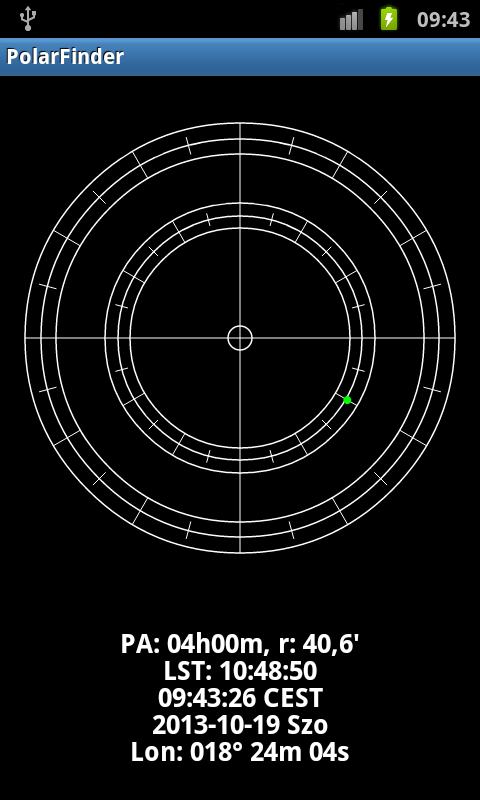
Historically, when I have done a rough polar alignment I have started by pointing about a half degree from Polaris towards the 'bright' star Kochab, as this is approximately the location of the north celestial pole.  I wanted to do a fairly precise alignment (short of drifting) and grabbed my phone to look up the location of the pole for the current time...in doing so I wondered if there was an application for my Android that might tell me and sure enough I found a great little application called "Polar Finder" which uses GPS for my time and location and then with the reticle of my choosing shows me where Polaris should be placed in the polar alignment scope.  At right is a generic screenshot from the application which shows a basic reticle (there are patterns for most well known polar scope makers) and Polaris as a green dot.

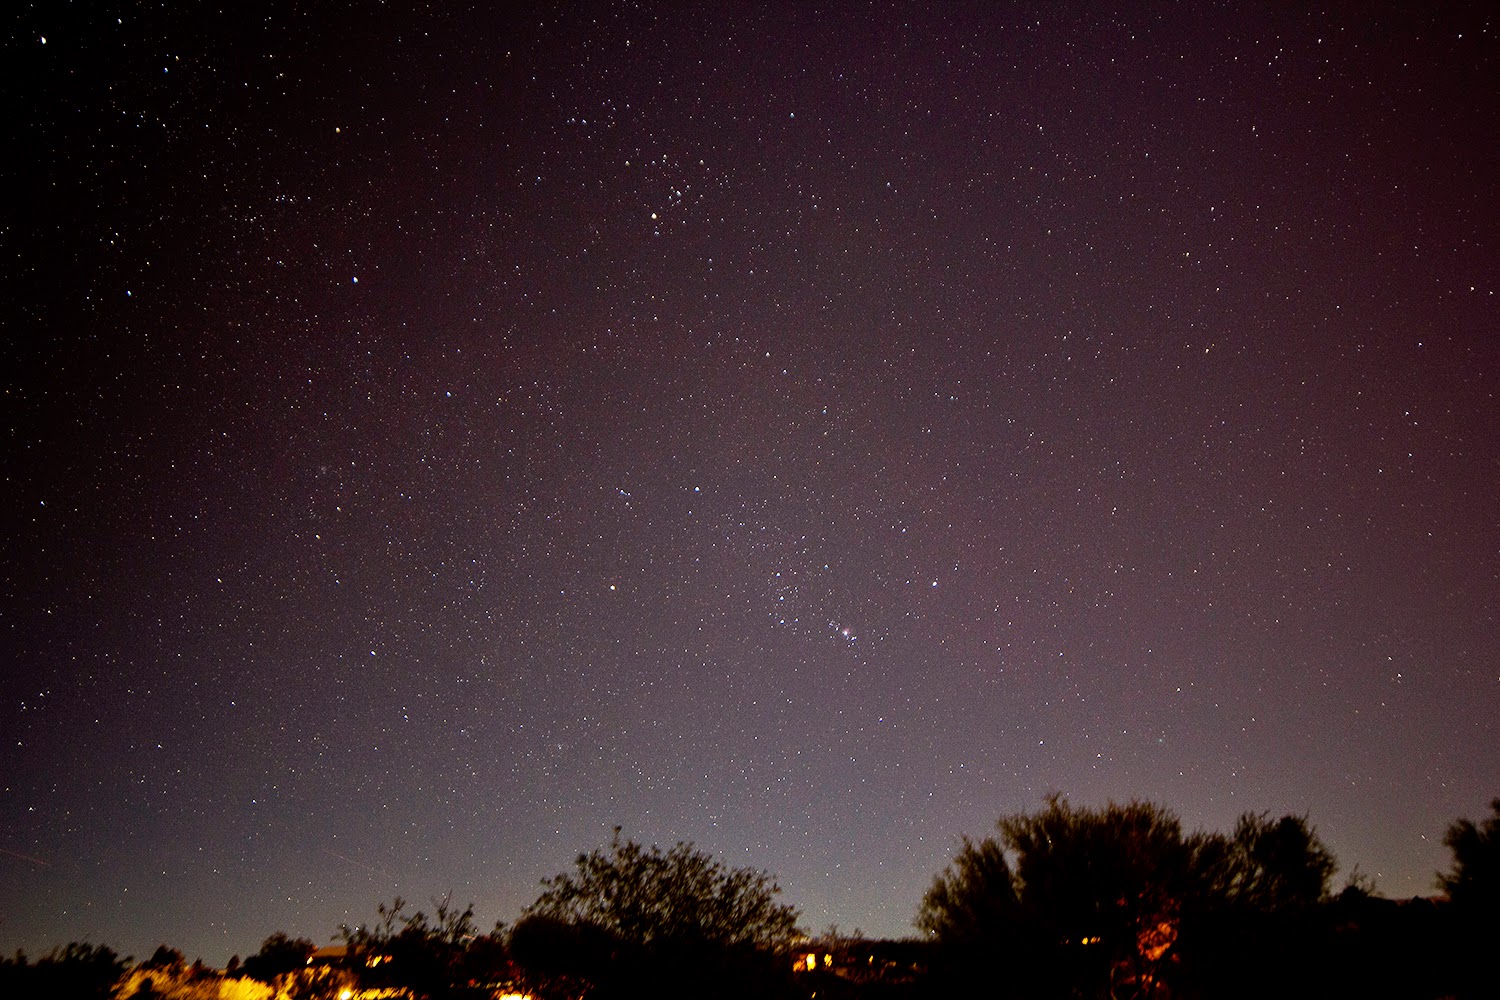
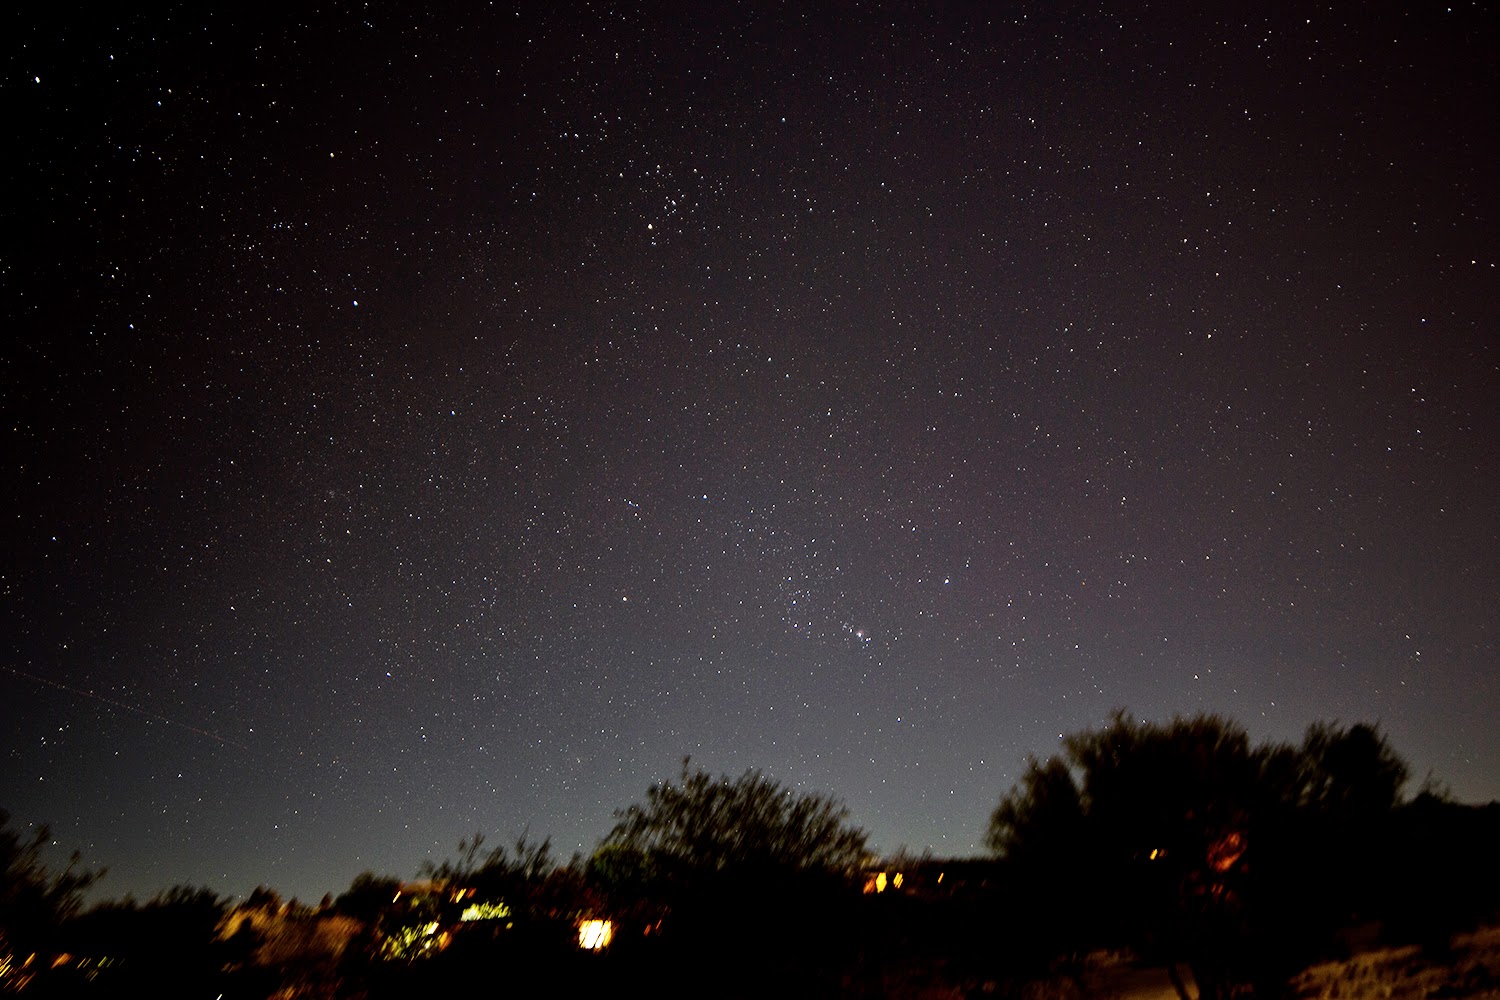
I know, get to the point, right?  Well, after polar aligning things I set up the Canon with my 14mm Rokinon f/2.8 and started taking exposures.  I did discover that in messing around as much as I was, I had the lens very slightly out of focus.  I'll post them below, but keep in mind that I was only checking to see if stars were trailing and not trying to make pretty pictures...Don't make any assumptions about the sky brightness as I did utilize Photoshop to darken the sky background as the moonlight was wickedly bright, and for most (not all) of the images I also set the ISO to 100 to reduce the sensitivity of the sensor in attempt to not get images that looked like daylight.  Below are the images with the duration in the captions, but the bottom line is that for DSLR long exposure photography, the mount delivers.

60 second test
120 second test


240 second test
360 second test


Finally, as I mentioned, I was doing some visual observing while the camera was doing its thing and lastly I looked at the moon through my TEC 140.  I couldn't resist sticking the camera in there and snapping a shot before heading in. The image below is a single shot, taken at ISO 800 for 1/1000 of a second.  Note that this was done on a non-tracking, alt-az mount!  Enjoy!


Sunday, December 28, 2014

Star Adveturer! And Comet Lovejoy (C/2014 Q2)!

Nearly New Years and I am finally writing another blog post!  Shortly after the eclipse which was the subject of my last post, Tucson hosted the 3rd annual Arizona Science and Astronomy Expo (ASAE).  You can read a report on this annual show on the blog of my friend Dean Ketelsen.  At the show I ran into another friend, Kevin Legore, who works for Sky-Watcher USA and Kevin showed me a new product that they were carrying called the "Star Adventurer," which is essentially a mini-equatorial mount and wedge designed for use on a photo tripod and with a DSLR.  Kevin noted that they would not be able to ship until the end of November so as soon as I got home from the show I went on their webpage and ordered a Star Adventurer knowing I had about a month to save the money.

I have enjoyed taking wide-field images of the milky way with my camera and have even made a few attempts at time-lapse photography such as from the Grand Canyon this summer.  Naturally, I have been limited to exposures in the range of 20-25 seconds before stars would start to trail.  This is less of an issue from my home due to light pollution, however, from Mount Lemmon or other dark sites such as Portal I would enjoy taking longer exposures.  One common way to track stars and take long exposures is to piggy back one's camera on a telescope, however, that has two disadvantages for me.  One is that it requires far more set up and gear than a simple camera tripod, and two, it means that I can not observe an astronomical target through the telescope if my priority is framing a milky way image.

Right on cue at the end of November, I received an email indicating that my credit card was being charged and that the Star Adventurer was being sent on its way.  Due to busy work schedules, poor weather, and a home renovation project (now complete) I was not able (or motivated) to test the Star Adventurer until last night.  It is not my intention to write a thorough review of the mount, nor could I after only one night of use.  Just like any other piece of equipment it takes some time and practice to learn the finer points of alignment and use.  As you will see below the Star Adventurer works as advertised.  Running on 4 AA batteries (it can also be powered by USB) it tracks the apparent motion of the sky at one of several user-selected speeds.  I only used the stellar setting in my attempts last night.  In addition, I did not calibrate the included polar scope to the mount (meaning it could be slightly misaligned), and I only performed a rough polar alignment placing Polaris about where it ought to be in the scopes reticle.  My main objective was simply to see if the unit worked as I was a fairly early adopter.  Good enough for government work anyway!


My first target, as it should be this time of year, was the constellation of Orion.  The camera attaches to the Star Adventurer with a user supplied ball-head and the first lesson I learned was that everything needs to be tightened down securely!  Not just to prevent a major disaster, but also to prevent the camera from slowly slipping/rotating during the exposure.  Once I had everything snug, I took the picture below with a 14mm f/2.8 Rokinon manual lens at ISO 800 for 30 seconds. Click to enlarge (and ignore the lens flare at lower left from a neighbors security light!).


As the sensor was exposing, I remembered that Comet Lovejoy (C/2014 Q2) was moving up through Lepus and toward Orion.  I grabbed my binoculars, found the comet easily and noted its location.  I then zoomed in on the image I had just taken and BAM! there was the comet! Below is the same image and you will see at lower right that Comet Lovejoy is labelled.


I then decided to see how the Star Adventurer would handle a heavier load and installed my Canon 70-200 f/4 zoom in place of the smaller Rokinon to image the comet.  Below is am image of the comet.


Recent images of this comet have shown that its tail has been having a very interesting past few weeks, separating from the comet with a new tail growing in place of the previous- this article from Universe Today explain matters.  I took another exposure with the ISO too high (3200) to see if I could detect any tail structure...sure enough I thought I could see hints of one, so I inverted the image, stretched things a little and sure enough, you can see a thin tail stretching to the NE in the image!


Finally, as long as I had the the heavy lens out I centered the Orion Nebula and took a 30 second image of that region, and below is the result.


All in all, pretty impressive results for night one, and remember that all the above are single shots, no stacking of images.  Taking images with heavy lenses will likely require the optional counterweight kit that Sky-Watcher sells as it did seem that the mount would struggle at certain orientations.  Also, while I stuck to 30 second exposures last night just to make sure the mount worked (I have it on some authority I ordered the first one in the US!), a more critical polar alignment is needed for me to take long exposures.

Monday, October 27, 2014

Partial Solar Eclipse

Last Thursday we witnessed a partial solar eclipse of the Sun- and for some reason this particular eclipse did not grab the attention of the media the way that the past few have.  It seemed that there were far more stories in the popular media for the lunar eclipse a couple weeks ago than for this event, despite the lunar eclipse happening in the middle of the night and the solar eclipse happening in mid-afternoon.  I was up at the Mount Lemmon SkyCenter with my colleagues (we streamed the eclipse live) and took the opportunity to take some images of the eclipse of my own.

I was using my Stellarvue 90mm triplet refractor with a Lunt Solar Systems Herschel Prism and my Canon T2i.  All the images were taken at 1/4000 of a second, ISO 100 and were shot in raw format.  I was shooting at a very high shutter speed in order to try and minimize the effects of atmospheric turbulence in my images.  I later used photoshop to increase the exposure value and stretch the contrast of the images.  Overall, the seeing conditions ranged from good to spectacular during the first part of the eclipse, but as mid-eclipse approached the conditions deteriorated slightly.  Below are a few of the best images that I captured, and as always, click to enlarge.

Start of Eclipse

Sharpest of my images, quite happy with this one!

Near greatest eclipse

A nice view after maximum eclipse, atmosphere not as stable

EDIT: The large sunspot region on the face of the Sun during the eclipse, Active Region 12192, has produced (as of yesterday) 9 X-class flares and is obviously quite large.  "How large" you are wondering?...well the blog of the SDO mission has published an interesting post comparing AR 12192 to previous spots.  If you look at the graph they provide you will see that this is the largest spot region (by area) in the past two solar cycles!  They report that it is the 33rd largest on record, and within the top .01% of all spots.  Pretty impressive stuff!

We were rather lucky to have this spot during the eclipse, and even luckier that it was in the Sun's southern hemisphere and not eclipsed by the moon, making for some pretty pictures.  Looking forward to the August 2017 Total Eclipse!

Wednesday, October 8, 2014

Lunar Eclipse in LA

I am in Los Angeles visiting my sister and her family in advance of some meetings related to work over the next three days (I hope to post some photos from today's meeting later...).  Very early this morning there was a total lunar eclipse, which is the type of event that even the drastic light pollution of Los Angeles can not diminish.  After spending yesterday at the beach, I was too tired to watch the whole eclipse, but I did manage to pull myself out of bed at about 2:50 AM to watch the moon slip towards totality at 3:25 AM PDT.  I was joined by my insomniac sister, who despite having instructed me not to wake her to watch the eclipse is rumored to have enjoyed it.  Below are two images I took with my Canon T2i and my 70-200mm f/4 lens during the eclipse.  Somehow in all my fiddling I did not extend the zoom all the way, so the images are taken at 180mm.

First, approaching totality at 3:19 AM (1019 UT), 1/2 second at ISO 400.  Note the blue dot to the left of the moon...and be sure to enlarge the image to see the blue dot.


Second, at 3:35 AM (1035 UT) about 10 minutes into totality.  1/3 second also at ISO 400...again, note that blue dot about a half-degree left of the moon...Anatomical jokes aside, that little blue dot is Uranus!  Make sure to enlarge to full size to see it.


And just in case you are having a hard time, here it is labelled!


Saturday, September 13, 2014

Cumulonimbus incus

Thursday night I was up at the Mount Lemmon SkyCenter doing some work aligning a telescope with a colleague and we noticed this beautiful thunderhead in the western sky at sunset.  It looked remarkably like a nuclear blast and the colors in the sky painted it beautifully.


Technically, I believe this is what is commonly referred to as an anvil cloud or in meteorological terms a single-cell cumulonimbus incus. (Incus is Latin for anvil).  These are very impressive thunderheads that can reach very high into the stratosphere, even to altitudes of 60,000 feet!

The image was taken with my Canon T2i and a 24-105mm f/4L lens operating at 50mm.  The exposure was handheld at 1/60 second, ISO 400, f/4.


Wednesday, September 3, 2014

Comet Jacques (C/2014 E2)

I have always enjoyed observing comets and have sketched several nice ones over the last decade.  More recently with my foray into the world of DSLR photography I have also taken a couple pictures of comets such as C/2011 L4 Pan-Starrs in the evening sky.  With a few clear nights this week as the monsoon season wraps, I made a couple observations of Comet Jacques (C/2014 E2) which has been in the northern sky for a few months.  This comet was discovered this past March, and reached perihelion (its closest point to the Sun) on July 3rd 2014, passing Venus ten days later at a fairly close 7.9 million miles!  On August 28th, the comet made its closest approach to Earth at 52,415,761 miles, which is comfortably, a little more than half the distance to the Sun.

Two nights ago, on Sept 2 (UT) I took my first pictures of a comet through a telescope!  Using my 140mm refractor, I captured ten 20-second images of the comet, at ISO 1600 using the program BackyardEOS.  Below is a single image of the comet with the levels and contrast adjusted in photoshop.


My intention in taking 10 exposures was to stack them, bringing out any detail that may not be visible to the eye or in a single exposure.  In the stacked image below, you can see that I aligned the images on the comets nucleus and as a result the stars appear to trail.  There is a brighter inner coma around the nucleus as visible in the above image, and stacking the exposures revealed a fainter outer envelope of glowing gas.


Being my first try with a comet, I think this little experiment turned out quite well.  This attempt was all about getting my feet wet imaging a comet with a DSLR.  Next time I will pay more attention to timing my exposures in order that the star trails are more uniform, and will also spend a little more time figuring out the optimal exposure.

Saturday, August 23, 2014

School is back in session

The Sky School that is.  This weekend is our annual training workshop for the graduate student fellows who serve as science instructors at our immersive, residential UA Sky School.  This year we have an outstanding group of 8 graduate fellows who will spend the academic year leading programs at the beautiful campus of the Mount Lemmon SkyCenter.  Below is an image of the group at Windy Point on the Catalina Highway.


As we hiked through the Lemmon Rock and Meadow Loop trails in the afternoon we were treated to some spectacular views of isolated thunderstorms moving across the Tucson valley.  Below is an image of one of these downdrafts.


Final image from the day is a Red Tailed Hawk that spent a few minutes checking us out during our tree identification lessons.  In case you are curious, he is sitting in a Ponderosa Pine, about 20 feet off the ground.  Click the image (or any of the others) to enlarge.


Monday, August 18, 2014

More stormy skies

Captured a few more images tonight, although the conditions were not nearly as favorable as last night.  Below are two images from tonight's storm taken with the Canon T2i and Rokinon 14mm f/2.8.  The first shows the clouds and rain illuminated from above and behind, while the second shows a strike within the falling rain.


Monsoon lightning

This weekend I received a new lens that I purchased specifically for taking exposures of the Milky Way, a Rokinon 14mm f/2.8.  This lens has a very good reputation for night time photographing of the skies and I was very happy with my first couple of shots (posted yesterday).  Despite the lens being fully manual with no electronic connection to the camera making focusing in the dark a challenge, the images are sharp and colors are rendered quite nicely.  Last night we had widespread thunderstorm activity throughout the Tucson valley and while we did not receive much rain at my house there was quite a bit of lightning.  I managed to capture the image below with the new lens; it is a 4 second exposure at ISO 400.  The raw file was processed in Photoshop and reduced in size for bandwidth purposes.  The picture was taken at 7:40 PM and it was quite dark out.  The illumination you see is primarily from the lighting itself.


Sunday, August 17, 2014

Summer roundup

3 posts in 3 days faithful readers, I can hardly believe it myself.  My summer is essentially over with the University returning to full swing next week and our programming with the Mount Lemmon SkyCenter and UA Sky School full steam ahead.   I have been promising pictures from Mount Lemmon and without further ado below is an image of several of our domes taken from a very nice vantage point.  I was borrowing a friends Canon 6D which is a full frame camera (and a dream of mine) and using my 24-105mm zoom lens.  The image (as all of them in this post) is presented at a reduced resolution.  Overall I was very impressed with the dynamic range of 6D as well as the low noise when shooting at high ISO.


Any self-respecting blog post sharing images from Mount Lemmon must include a sunset.  No matter how many times I have watched sunset (more than I can count) from the summit, it is far and away my favorite experience on the mountain.  The image below was taken from the northwest area of the summit ridge while sitting quietly with a group of high school students visiting from Fryeburg Academy in Maine.  This was taken with my Canon T2i and a 10-22mm zoom lens.


This weekend we have seen some monsoon thunderstorms of the variety that make 2 months of no astronomical observing worthwhile.  These storms are simply ferocious with winds raging to 60 mph, driving rains, and lightning that can strike fear in even the most seasoned natives among us.  One of the benefits to these storms are the multitude of photographic opportunities that precede and follow them.  Below are two images from the storm we had Friday night.  Both images preceded the sunset storm with the clouds high in the western sky and rainbow in the eastern sky.


Both of these images were among the first I have taken with a new Rokinon 14mm f/2.8 lends that I received on Friday.  I had just enough time to open the box, attach it to my Canon T2i and run outside.  I purchased this lens primarily for use in shooting the milky way due to it's fast aperture and reputation.  That being said, I was very impressed with the way the lens handled the spectacular colors in the evening sky and I will certainly be playing with this in the daytime as well.  This summer I had the opportunity to make a new friend, Jon Webb, at the Grand Canyon Star Party and he introduced me to this lens.  He spent the week imaging the Milky Way with this lens and you can see his results below.


Timelapse in Canyon Country from Jon Webb on Vimeo.
This short series of night and day sky time-lapse videos were taken during the summer of 2014 between Arches National Park, Canyonlands National Park and on the north rim of the Grand Canyon national park. While this video was not sponsored by the U.S. National Park Service (NPS) I would like to thank the NPS and all its employees for maintaining such beautiful locations so that I and others can enjoy the night sky from them. I would also like to thank the Saguaro Astronomy Club in Phoenix, AZ for hosting the star party on the north rim of the Grand Canyon where part of this footage was shot. Finally, while I do not own the rights to the soundtrack I would like to highlight the music, Human Legacy, produced by Ivan Torrent and I highly recommend viewers of this video check out his music.


Monday, June 30, 2014

Milky Way Time-lapse

I just returned from spending 8 nights supporting the 2014 Grand Canyon Star Party as a volunteer at the north rim lodge and visitors center.  It was a fantastic time doing astronomical outreach with great friends.  While I have barely had a chance to unpack, I did spend a few minutes tonight stitching together 285 frames I shot of the Milky Way into a 30 second time-lapse.  Each frame was a 25 second exposure with my canon T2i and 10-22mm zoom lens at the 10mm setting.  I do hope to write a trip report and share some of the photos here on my blog, but for now enjoy the video below.  I recommend clicking 'play' and then on the settings icon on the right and selecting full HD as the video will default to a lower resolution.

Tuesday, April 15, 2014

Total Lunar Eclipse

The full report and images will come later, but I wanted to quickly share one of the images I took during last nights total lunar eclipse.  I captured a couple hundred images through my 90mm Stellarvue triplet refractor and 1.6x Barlow lens using my Canon T2i, and they are all in RAW format...so when I have the time to go through them I hope to perhaps make a time-lapse of the eclipse, or at least share some of the nicer shots.  For now, enjoy this image taken at 12:54:54 local time (0754 UT on April 15th).  Click the image to enlarge.


Wednesday, February 5, 2014

Photo opportunities

One of the benefits of working at the Mount Lemmon SkyCenter, is the opportunity to see many things that one would not normally witness down in the city, or even at lower elevations.  Yesterday I was at the Mount Lemmon summit all day and took a few pictures of some of the sights-  I'll present them here in chronological order.  First up is a picture of what I believe is a Blackhawk helicopter that made several passes and landings at our site during the early afternoon.  We have a helipad on site (think wildfire fighting, mountain rescue, etc) and it is likely that the pilot and crew thought our mountaintop site would make for a nice training location.


As the Sun was beginning to head toward the horizon, I took the image below looking east toward the Large Binocular Telescope (LBT).  While at least a 4 hour drive from the summit of Mount Lemmon, it is likely only 75-80 miles away as the crow flies. In addition to revealing beautiful colors on the intervening landscape, the low angle of the Sun illuminated the dome nicely and you can see it as the little white rectangle at the center of the image.


This is a full resolution crop of the center, and you can make out the slit in the center which opens to reveal the telescope.


Finally, we are often treated to fantastic sunsets and last night was no exception.  Quite often we can see the green rim of the Sun and I am always trying to take a picture of it.  I managed to capture one of my better ones last night, mostly due to the fact that it was one of the strongest I have seen in some time.  While viewing this phenomenon typically requires some magnification, last nights green rim was exceptionally vivid.


Wednesday, January 22, 2014

Supernova in M82!

Word has spread quickly of the likely Type Ia supernova in nearby galaxy M82 (The cigar Galaxy).  Surely news will continue to flow about this event as professional and amateur astronomers around the world turn telescopes, eyes and cameras toward the galaxy to observe the Supernova.  M82 is only 12 million light years away, which is fairly close as galaxies go.

In an absolutely amazing coincidence, two nights ago I was taking an image of Jupiter and after I finished I decided to take my first look at this galaxy this season.  I was very tired, but as I observed it in my 11-inch SCT I noticed a star in the central portion of the galaxy and thought to myself that I did not recall that star.  Typically I would not know the star patterns around galaxies but it happens that I have observed this galaxy more than perhaps any other galaxy.  You can see my sketch and report on this galaxy in a post I made back in February of 2010.  I even have a wonderful image of it hanging in my office on canvas.  My reaction two nights ago was that somehow I had never noticed this faint star before, and my thought was that as seeing conditions were very good, my new 11 inch telescope was delivering a fine image.  Imagine my surprise today when I heard that there was in fact a supernova!  So in my own way, I feel like I discovered it without any prior knowledge...if only I had put 2 and 2 together!

The best part of the story is that when I called my good friend and astronomy mentor Jerry Farrar today to let him know there was a supernova, his cut me off to exclaim "You are kidding!  I saw that two nights ago!"  He did not know either and described to me its exact location...so we are both reveling in our own independent "discovery" of this transient event.

Tonight I wanted to take a picture of the supernova and that meant I had to attempt my first image of a galaxy.  I used my Canon T2i and the software BackyardEOS attached to my 11 inch Celestron Edge SCT.  Now that I have a little experience stacking images of Jupiter, I took a sequence of 10 images of 15 seconds each at ISO 1600.  I aligned and stacked the images and with a little processing in photoshop ended up with the image below.  It is far from an inspirational image, yet it is really exciting for me to get this result...and of course, it shows the supernova (marked by the red lines)!


Wednesday, January 8, 2014

Active region 1944

The last few days have seen some remarkable images of the sunspots contained within active region 11944 that are making their way across the face of the Sun.  While I had taken a couple images late last week (posted here), I wanted to revisit the area this morning during a break from work.  Working at home this morning allowed me to run out and take a look at this region once again.  Seeing was a little above average with some some thin cirrus that are heralding an arriving cold front (maybe I should say a 'cooler front' in light of what our east coast brothers are experiencing this week).

All images were taken through my Stellarvue 90mm triplet and  Lunt Solar Systems Herschel Prism.  First, a whole disc image using my Canon T2i and a 2x Barlow lens- it is a single frame...click to enlarge.
Next, is a stack of 500/1000 frames captured with my ASI120MC video camera.  This comparison to the above image shows the benefit of stacking multiple images to obtain a higher and sharper level of detail than can be achieved in a single shot as above.  Again, click to enlarge.


Finally, an image of the same region using the ASI120MC and a 2x barlow.  This active region is massive, and with a proper solar filter can be seen without optical aid...it is perhaps the most impressive spot region I have seen in several years.  Click to enlarge.